How to Replace a Clutch Disc Without Special Tools in 2026

Time:2026-11-02 Author:Mason
0%

Replacing a worn clutch disc can seem like a job reserved for a fully equipped workshop. In some vehicles, careful planning and common hand tools can make the repair possible. This guide explains How to replace clutch disc without special tools, while keeping safety and vehicle-specific requirements in view. Expect a heavy transmission, stubborn fasteners, and limited working space beneath the car. Small details matter.

Before turning a wrench, check the service information for your exact make, model, and year. Clutch layouts and torque specifications vary. Gather the correct sockets, a sturdy floor jack, properly rated jack stands, and a way to support the transmission securely. Never work beneath a vehicle held only by a jack. A level surface helps. So does patience. If the transmission feels unstable, or you cannot safely separate and support it, stop and get experienced help.

The process also depends on centering the new disc before tightening the pressure plate. Some mechanics use a basic, vehicle-compatible alignment aid or a carefully checked method described in the repair manual; a poor fit can prevent the transmission from sliding back into place. Do not force it. This introduction sets out what to inspect, what ordinary tools may be sufficient, and where a special tool or professional assistance is the wiser choice. I have seen “close enough” turn into hours of rework. Take measurements twice, follow specified torque values, and replace related parts only when inspection or the manufacturer’s guidance supports it.
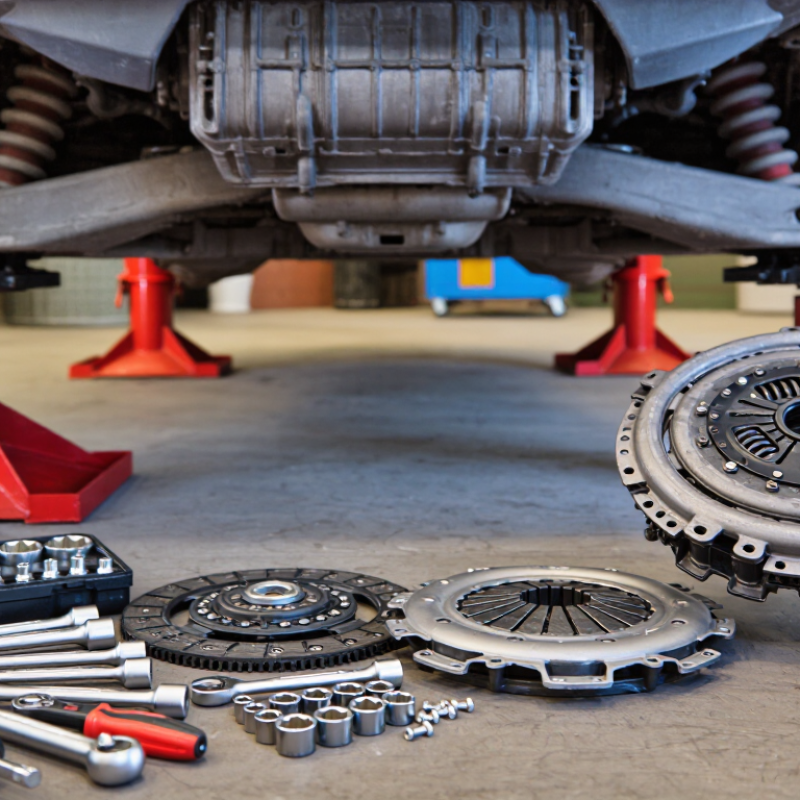
How to Replace a Clutch Disc Without Special Tools in 2026

Safety Precautions and Basic Tools for Clutch Disc Replacement

Before replacing a clutch disc, check the vehicle’s service manual for lifting points, torque values, and transmission removal steps. Park on firm, level ground, switch off the engine, and chock the wheels. Raise the vehicle only at approved points, then support it with correctly rated jack stands. A hydraulic floor jack alone is not safe support. Keep a suitable jack under the transmission; it is heavy and can shift unexpectedly. No shortcuts here.

Basic equipment usually includes metric or standard sockets, wrenches, screwdrivers, pliers, a work light, and a torque wrench. Wear safety glasses and gloves, and let hot parts cool before touching them. Brake cleaner and a lint-free cloth can help clean the flywheel, but avoid breathing spray or dust. Keep fingers clear.

A clutch alignment tool is useful, but some discs can be centered carefully with a snug-fitting dowel or suitable socket extension. Check fit before tightening anything. Never use bolts to pull a misaligned transmission into place; that can damage the disc or input shaft. Clean mating surfaces, inspect for cracks or deep scoring, and replace damaged parts rather than hoping they will be fine. This job is awkward, and working alone can make it worse. If the transmission will not seat easily, stop and reassess.

Prepare the Vehicle and Remove the Transmission

Park on firm, level ground and let the exhaust cool completely. Set the parking brake and chock the wheels that remain on the ground. Disconnect the negative battery cable before working near electrical connections. Use a floor jack and properly rated jack stands to lift and secure the vehicle; never rely on a jack alone. Keep ordinary sockets, a breaker bar, and containers for any fluid nearby. Check the vehicle’s service information for lifting points and the correct removal sequence. Small differences matter.

From underneath, remove any guards that block access, then disconnect the shift linkage, wiring plugs, and starter as required. Label connectors with tape, and take a quick photo before unplugging them. If the service procedure calls for draining transmission fluid, do so before separating the unit. Support the engine and transmission independently with suitable supports. Remove the driveshaft and transmission mount or crossmember only when each component is secure. This part is awkward. A transmission is heavy and can shift suddenly, so ask another person to steady it. Remove the bellhousing bolts, then ease the transmission straight back until it clears the clutch. Don’t pry against the clutch parts or let the transmission hang from the input shaft. Recheck hidden connections if it will not move; forcing it can cause damage.

Inspect the Clutch Assembly and Remove the Worn Disc

With the transmission safely supported and removed, inspect the clutch before loosening anything. The disc sits between the pressure plate and flywheel. Look for uneven wear, cracked or missing friction material, oil contamination, and blue heat marks. A thin dust coating is normal; oily patches are not. Avoid blowing dust into the air. Use a damp cloth and follow the vehicle’s service guidance.

Check the pressure plate for scoring, cracks, or uneven contact marks. Examine the flywheel for deep grooves and heat spots, too. Small details matter. Oil around the assembly may point to a leaking engine or transmission seal, so replacing the disc alone might not solve the problem. If the flywheel surface looks badly damaged, pause and confirm whether it needs resurfacing or replacement.

Before removing the worn disc, note which side faces the flywheel. A phone photo can help, though it is easy to forget what the picture shows later. Loosen the pressure-plate bolts a little at a time, working in a crisscross pattern to release spring pressure evenly. Keep one hand under the disc as the final bolts come free; it can slip unexpectedly. Check the splined hub and nearby parts for damage. If anything feels loose or the assembly differs from the service information, stop and verify the correct procedure before continuing.

Center and Install the New Disc Without a Special Tool

Centering is the fussy part of a clutch-disc replacement. A small offset can stop the transmission input shaft from entering the disc. Support the vehicle on properly rated stands, disconnect the battery, and support the transmission before working beneath it.

If the original transmission input shaft is available, use it as a guide. Otherwise, make a simple mandrel from a straight, rigid dowel. Fit it snugly through the disc hub and into the pilot bearing; add smooth, secure sleeves if needed. It should slide in without force and sit straight. Keep the disc’s marked flywheel side facing the correct direction, as specified for the vehicle. A detail easily missed.

Hold the disc against the flywheel, then fit the pressure plate loosely. Keep the mandrel centered while tightening the plate bolts gradually in a crisscross pattern, following the vehicle’s specified torque. Do not let the disc shift. Remove the guide and check alignment again. The transmission should meet the engine without being pulled into place with its bolts. If it resists, stop and recenter; forcing it can damage parts. Wipe away any oily fingerprints before installation. I would not trust a homemade guide that wobbles, even if it seems close enough.

How to Replace a Clutch Disc Without Special Tools in 2026 — Center and Install the New Disc Without a Special Tool

Stage What to Do Useful Checks and Data Important Notes
1. Confirm the setup Check the vehicle service information and identify the clutch type before starting. Record the specified disc orientation, fastener torque values, tightening sequence, and any clutch-adjustment procedure. Specifications vary by vehicle. Self-adjusting clutch assemblies may require a dedicated procedure or tool.
2. Make the vehicle safe Disconnect the battery as appropriate, raise the vehicle on a level surface, and support it securely before removing the transmission. Use correctly rated jack stands and a transmission jack or other suitable, stable support for the transmission. Never work beneath a vehicle supported only by a jack. Follow the vehicle maker’s lifting points.
3. Remove the transmission Remove the components needed to access the bellhousing, then separate and lower the transmission according to the service procedure. Support the transmission’s weight and keep it aligned while separating it from the engine. Do not let the transmission hang from the input shaft or clutch components.
4. Remove and inspect Loosen the pressure-plate fasteners gradually in a crisscross pattern, then remove the pressure plate and old disc. Check the flywheel and pressure plate for cracks, heat damage, deep scoring, or uneven wear. Inspect the release bearing and pilot bearing or bushing if fitted. Replace or service damaged parts according to the vehicle’s repair information.
5. Prepare a no-special-tool centering aid Use a compatible old transmission input shaft if available, or make a smooth temporary guide from a straight dowel or suitable plastic tube. The guide must fit the disc splines closely and sit snugly in the pilot bearing or bushing. Compare its shape and fit with the removed input shaft where possible. Do not force an oversized guide into the pilot bearing or use a loose guide that lets the disc sag.
6. Position the new disc Place the disc against the flywheel with the correct side facing the transmission, then pass the improvised guide through the disc hub and into the pilot bearing. Follow any “flywheel side” or “transmission side” marking on the disc. If there is no marking, verify orientation in the part instructions or vehicle service information. Disc orientation is not universal. Do not assume the hub’s protruding side always faces the same direction.
7. Install the pressure plate Fit the pressure plate over the disc and start all fasteners by hand. Tighten them gradually in a crisscross pattern. Use the specified torque and tightening sequence for the exact vehicle and clutch assembly. Do not guess the torque value or fully tighten one side before the others.
8. Check centering Before fully tightening the pressure plate, make sure the guide slides in and out smoothly and the disc remains centered. The guide should remain aligned with the pilot bearing and disc hub without being pushed sideways. If the guide binds or the disc shifts, loosen the fasteners slightly, recenter, and tighten evenly again.
9. Refit the transmission Remove the guide and carefully align the transmission input shaft with the disc splines and pilot bearing. The transmission should approach the engine squarely and seat without being drawn in by the bellhousing bolts. If it will not seat by hand with controlled alignment, pull it back and check spline alignment. Do not use bolts to force it together.
10. Reassemble and test Reconnect removed components, adjust the clutch if required, and verify pedal operation and fluid levels before a cautious road test. Check for abnormal noises, leaks, warning lights, and smooth clutch engagement. Follow any bedding-in instructions supplied with the replacement clutch.

Safety note: Clutch and transmission work involves heavy components and vehicle-specific procedures. Use the correct service information and suitable supports; consult a qualified technician if any step is uncertain.

Reinstall the Transmission and Test Clutch Operation

Support the transmission with a stable jack before removing its final fasteners. Check that the clutch disc is centered and its hub faces the correct direction. Guide the transmission’s input shaft into the disc gently; never use bellhousing bolts to pull a misaligned transmission into place. It should seat without force. A small wobble can mean the shaft is not aligned, so back out and check again. This step can feel slower than expected. Replace or reconnect mounts, wiring, hydraulic lines, and driveline parts as specified for the vehicle. Tighten fasteners to the vehicle maker’s torque values, not a guessed setting. S&P Global Mobility reported that the average US light vehicle age reached 12.6 years in 2024, making careful maintenance of older vehicles especially relevant.

Before starting the engine, confirm that tools are clear and the vehicle is securely supported. With the engine off, press the clutch pedal several times and check for smooth movement and a consistent return. Start the engine in neutral, then select a gear with the pedal fully depressed. Listen for grinding, feel for abnormal vibration, and check for fluid leaks around the hydraulic connections. Don’t rush this. If the pedal feels unusually soft or gears resist engagement, stop and inspect the release mechanism and hydraulic system. After a stationary check, test the clutch at low speed in a clear, level area. Confirm smooth take-up and disengagement; avoid hard launches during the initial test.

Reinstall the Transmission and Test Clutch Operation

Approximate planning times for common reinstallation and testing steps. Actual time depends on the vehicle, setup, and whether hydraulic bleeding is needed. Follow the vehicle’s service manual for fastener torque and adjustment specifications.

FAQS

What should I check before replacing a clutch disc?

Read the vehicle’s service manual for lifting points, torque values, and transmission removal steps. Park on firm, level ground.

How should I support the vehicle and transmission?

Use approved lifting points and correctly rated jack stands. A floor jack alone is not safe support. Support the transmission separately; it can shift.

What basic tools and protective gear are useful?

Gather sockets, wrenches, screwdrivers, pliers, a work light, and a torque wrench. Wear gloves and safety glasses. Let hot parts cool.

Can I center the disc without a special alignment tool?

Yes. Use the original input shaft or a straight, rigid dowel that fits snugly through the hub and pilot bearing. It should slide in smoothly.

How do I keep the disc centered while tightening the pressure plate?

Hold the guide straight and tighten the plate bolts gradually in a crisscross pattern. Follow the vehicle’s specified torque. Check alignment again afterward.

Which way should the new clutch disc face?

Match the disc’s marked flywheel side to the vehicle’s instructions. It is an easy detail to miss.

What should I do if the transmission will not seat against the engine?

Stop and recenter the disc. Never use bolts to pull a misaligned transmission into place; that can damage parts. No shortcuts.

What should I clean or inspect before installation?

Wipe away oily fingerprints and clean mating surfaces with a lint-free cloth. Check for cracks or deep scoring, and replace damaged parts. I would not trust a guide that wobbles, even if it seems close enough.

Conclusion

How to replace clutch disc without special tools begins with careful preparation, not rushing into the repair. Park on a level surface, secure the vehicle, disconnect the battery, and use suitable lifting equipment and stable supports. Gather basic hand tools and plan for safely handling the transmission, which can be heavy. Remove the components needed to access it, then support and detach the transmission according to the vehicle’s service information.

With the clutch assembly exposed, inspect the pressure plate, flywheel, and related parts for wear or damage, and remove the old disc. Center the replacement disc using a simple, appropriately sized alignment aid or careful visual alignment, ensuring it sits evenly before tightening the assembly in sequence. Refit the transmission and all removed components, reconnect the battery, and check that the clutch pedal operates smoothly. Test the repair cautiously and stop if engagement feels abnormal.

Mason

Mason

Mason is a seasoned marketing professional with a deep expertise in the company's offerings and a passion for driving brand awareness. With a strong background in digital marketing strategies, he has an innate ability to connect with diverse audiences and effectively communicate product benefits.......