Clutch chatter and vibration can turn a smooth launch into a series of jolts. The shifter may tremble, the pedal may pulse, and the vehicle can shake when moving away from a stop. These symptoms often appear during clutch engagement, especially in traffic, on steep roads, or after recent clutch work. Understanding how to prevent clutch chatter and vibration starts with identifying the real source instead of replacing parts by guesswork.
A reliable diagnosis examines the clutch disc, pressure plate, flywheel, release bearing, engine mounts, and transmission alignment. Oil or grease on the friction surface can create uneven grip. A warped flywheel may produce hot spots, visible as blue or dark patches. Worn mounts can also imitate clutch problems by allowing excessive drivetrain movement. Small details matter. Even incorrect torque can affect alignment and clutch operation.
The practical question is: How to prevent clutch chatter and vibration before they become expensive repairs? Use the manufacturer’s installation procedures, measure flywheel runout, and replace damaged components as a complete system when necessary. During driving, release the clutch smoothly and avoid holding the vehicle on an incline with clutch slip. That habit creates heat. Too much heat.
Still, not every vibration has one obvious cause. I have seen drivers blame the clutch when loose mounts or uneven tires were responsible. A careful inspection by a qualified technician remains the safest approach. Record when the vibration occurs, whether the engine is cold or hot, and how strongly the pedal responds. These observations can shorten diagnosis and prevent another incomplete repair.
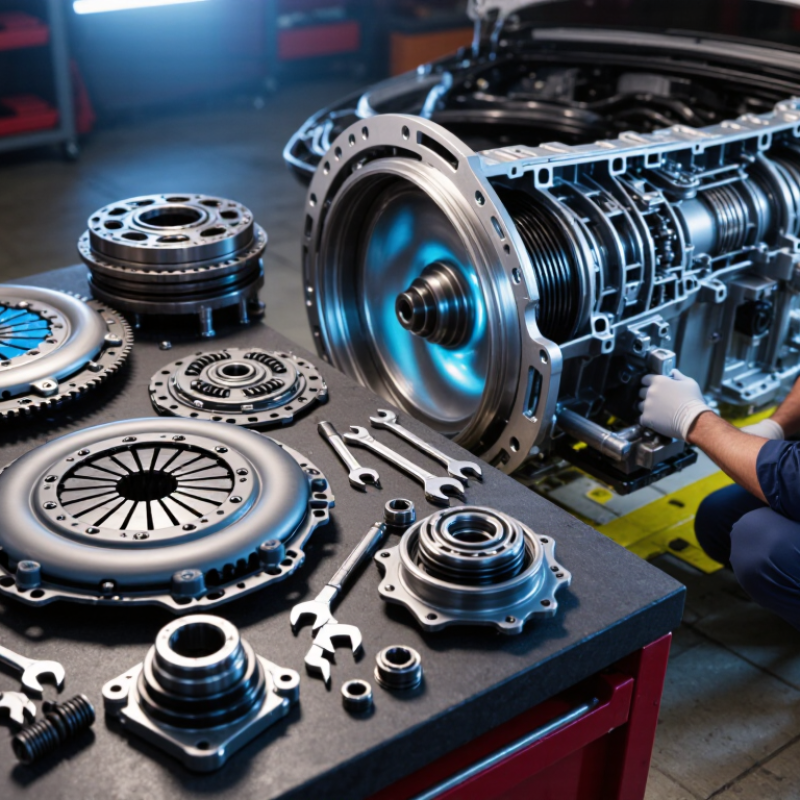
Understanding the Causes of Clutch Chatter and Vibration
How to Prevent Clutch Chatter and Vibration?
Clutch chatter feels like repeated grabbing during takeoff. Vibration may appear through the pedal, floor, or steering wheel. These symptoms usually begin with uneven friction between the clutch disc and flywheel. Oil contamination, glazed friction material, or a warped flywheel can create this uneven contact. Worn engine mounts may also let the drivetrain move excessively. That movement can make a minor clutch fault feel much worse.
A reliable diagnosis starts with inspection, not replacement. Check for oil leaks near the rear main seal or transmission input shaft. Measure flywheel runout and inspect the pressure plate for heat spots. Confirm that the clutch disc is installed correctly and that mounting bolts have proper torque. Hydraulic problems, including trapped air or a sticking release mechanism, can prevent smooth engagement. The easiest assumption is often wrong. A damaged mount may imitate a failing clutch.
Tips: Use gentle throttle during engagement and avoid resting your foot on the pedal. Keep the clutch area dry and repair leaks quickly. If chatter remains after installation, recheck alignment, flywheel machining, and mount condition. Short test drives help. Record when vibration occurs, such as cold starts, reverse gear, or uphill launches. That detail helps a qualified technician separate clutch faults from transmission or engine problems.
How to Prevent Clutch Chatter and Vibration?
Understanding the Causes of Clutch Chatter and Vibration
The chart ranks common clutch-chatter causes by relative diagnostic priority on a 1–5 educational scale.
Contaminated friction surfaces, uneven or warped mating surfaces, and worn powertrain mounts are key inspection areas.
Prevention includes keeping friction components dry and clean, checking flywheel and pressure-plate runout,
replacing damaged mounts, and bleeding or repairing the clutch hydraulic system when release is uneven.
Inspecting the Clutch System and Related Components
How to Prevent Clutch Chatter and Vibration?
Inspecting the Clutch System and Related Components
Clutch chatter often begins with uneven contact between the clutch disc and flywheel. Inspect both surfaces for heat spots, grooves, cracks, or bluish discoloration. A rough flywheel can make a new disc judder immediately. Measure flywheel runout with a dial indicator instead of relying only on visual inspection.
Check the clutch disc for oil, grease, warped friction material, and loose damper springs. Even a small leak from the rear main seal or transmission input seal can contaminate the disc. Inspect the pressure plate for uneven fingers and damaged mounting surfaces. The release bearing should rotate smoothly without grinding or side play. Small noises matter.
Related components deserve equal attention. Worn engine or transmission mounts can transfer normal clutch movement into the vehicle body. Check mounting bolts, bushings, driveshaft joints, and axle connections for looseness. Inspect the hydraulic system for air, leaks, or a sticking slave cylinder. A clutch that releases unevenly may imitate a mechanical vibration.
Use the correct alignment tool during installation, and tighten fasteners in the specified sequence and torque range. Keep friction surfaces clean. I have seen careful repairs fail because one oily fingerprint remained on the disc. That detail is easy to dismiss, but it can cause repeated shuddering. Test the vehicle gradually, noting whether vibration appears during engagement, acceleration, or gear changes. One overlooked component can distort the entire diagnosis.
Preparing the Vehicle for Clutch Troubleshooting
Before diagnosing clutch chatter or vibration, prepare the vehicle carefully. Park on a level, solid surface with good lighting. Let the engine and exhaust cool completely. Apply the parking brake, place the transmission in neutral, and use wheel chocks. A stable vehicle protects both the technician and the inspection results.
Gather a flashlight, gloves, basic hand tools, and the correct service information. Check the clutch pedal for unusual travel, stiffness, or a spongy feel. Inspect the hydraulic fluid level and look for damp areas near hoses, the master cylinder, and the slave cylinder. Examine engine and transmission mounts for cracked rubber or loose fasteners. These parts can imitate clutch problems. I have seen rushed inspections blame the clutch too early. That assumption can become expensive.
Tips: Record when the vibration appears. Note whether it happens during engagement, acceleration, reversing, or gear changes. Ask whether the vehicle recently carried heavy loads or received repair work. Inspect the tires and driveshaft area as well. Uneven tires, worn joints, or loose exhaust components may create similar sensations. Keep fingers, clothing, and tools away from rotating parts during any running check. If a lift is required, use properly rated equipment and approved support points. A second inspection can reveal what the first one missed.
Correcting Installation, Adjustment, and Alignment Problems
How to Prevent Clutch Chatter and Vibration?
Correcting Installation, Adjustment, and Alignment Problems
Clutch chatter often begins with installation errors, not a defective clutch. During workshop inspections, I have found uneven flywheel surfaces, contaminated friction discs, and loose fasteners behind many complaints. Clean every mating surface before assembly. Even a thin oil film can create uneven grip and repeated vibration.
Check the flywheel and pressure plate for warping, scoring, or hot spots. Measure them with suitable tools instead of relying on sight alone. Small errors matter. Always use the correct alignment tool, and keep the disc centered while tightening the pressure plate gradually in a crisscross pattern. Uneven tightening can distort the assembly.
Adjustment deserves equal attention. Excessive free play may prevent full engagement, while insufficient free play can cause constant contact and heat. Follow the vehicle’s service specifications, then test pedal movement and release action. Inspect engine and transmission mounts as well. A damaged mount can imitate clutch chatter. Alignment must be verified before final tightening, especially after transmission removal. I have sometimes blamed the clutch too quickly; a loose mount or misaligned input shaft was the real cause. Short road tests help, but the repair should not be judged by one gentle start. Test smooth engagement under different loads, and recheck fasteners if vibration remains.
Maintaining the Clutch to Prevent Future Vibration
How to Prevent Clutch Chatter and Vibration?
Maintaining the Clutch to Prevent Future Vibration
Regular clutch care begins with heat control. The U.S. Department of Energy reports that aggressive driving can reduce fuel economy by 15–30% at highway speeds. Repeated high-revolution launches create similar thermal stress inside the clutch assembly. Release the pedal smoothly. Avoid holding the vehicle on a hill with clutch slip. Use the brake instead.
During service, inspect the friction disc, pressure plate, flywheel, release bearing, and hydraulic system together. SAE technical literature connects uneven friction surfaces and changing contact temperatures with torque oscillation. Even a small oil leak can contaminate the lining. A clean-looking flywheel may still have hard spots. Measure it. Do not rely only on appearance.
I have seen drivers replace the disc while ignoring worn engine mounts. The vibration returned within days. That mistake is easy to make. Check mount movement, shaft alignment, and fastener torque during the same repair. Inspect hydraulic fluid for dark particles, then bleed the system when required. Keep pedal travel within the vehicle maker’s specification. A clutch can feel normal during a short test drive, yet chatter after thirty minutes of traffic. That is why road testing should include cold starts, reversing, hill launches, and stop-and-go driving. Maintenance records also matter; note mileage, symptoms, load conditions, and repair measurements. Small patterns often reveal the real cause.
FAQS
It feels like repeated grabbing during takeoff. Vibration may travel through the pedal, floor, or steering wheel. It often appears when engaging the clutch slowly.
Uneven friction between the clutch disc and flywheel is a common cause. Oil contamination, glazed friction material, heat spots, and warped surfaces can create this problem. A worn engine mount may make vibration feel worse.
Yes. Oil from a rear seal or transmission input seal can contaminate the friction disc. Even a thin oily film may cause repeated shuddering. Keep friction surfaces dry.
Look for grooves, cracks, heat spots, and bluish discoloration. Measure flywheel runout with a dial indicator. Do not rely only on appearance. Small errors matter.
Yes, it can. A weak mount allows excessive drivetrain movement during engagement. That movement transfers vibration into the vehicle body. The obvious answer can be wrong.
Incorrect alignment, loose fasteners, and uneven tightening can distort the clutch assembly. Use the correct alignment tool. Tighten pressure plate bolts gradually in a crisscross pattern. Check specified torque.
Air in the hydraulic system may prevent smooth release. A leaking or sticking slave cylinder can create uneven engagement. Inspect pedal movement, fluid leaks, and release action. Small noises matter.
Use gentle throttle during engagement. Do not rest your foot on the clutch pedal. Test gradually in reverse, uphill starts, and normal acceleration. Record when vibration appears.
Recheck alignment, flywheel machining, fastener torque, and mount condition. Inspect the disc for contamination again. A short test drive helps, but one gentle start proves little. I might blame the clutch too quickly.
Conclusion
Clutch chatter and vibration can make driving uncomfortable and may indicate problems within the clutch system, drivetrain, or related mounting components. How to prevent clutch chatter and vibration begins with understanding common causes, such as worn friction surfaces, contamination, uneven flywheel surfaces, damaged release parts, or incorrect clutch adjustment. Before troubleshooting, park the vehicle safely, allow components to cool, and gather the proper tools and service information. A careful inspection should include the clutch disc, pressure plate, flywheel, release bearing, linkage, transmission mounts, and engine mounts.
Many vibration problems can be corrected by replacing damaged parts, cleaning contaminated surfaces, resurfacing or replacing an uneven flywheel, and ensuring that all components are installed in the correct direction and sequence. Proper alignment of the clutch disc and transmission is also essential. Regular maintenance, smooth engagement, avoiding excessive slipping, and promptly addressing unusual noises or pedal behavior can help prevent future chatter and extend clutch service life.

 Galleo Auto Parts