How to Improve Clutch Performance and Durability

Time:2026-09-13 Author:Aria
0%

A clutch does more than connect the engine to the gearbox. It manages heat, friction, torque, and repeated driver input. In daily traffic, each launch creates a small thermal event. On steep roads, towing, or track days, that event becomes much more severe. Understanding these conditions is essential for improving clutch performance and durability.

What factors affect clutch performance and durability? The answer includes friction material, clamp load, flywheel condition, hydraulic pressure, alignment, and operating temperature. Driving habits matter just as much. Holding the vehicle on a hill with the clutch creates unnecessary slip. Resting a foot on the pedal can partially disengage the clutch for miles. Both habits accelerate wear. Contamination is another quiet problem. Oil on the friction disc may cause shuddering, slipping, or uneven engagement.

Small details matter.

A reliable improvement begins with inspection, not guesswork. Experienced technicians check disc thickness, release bearing movement, pressure plate markings, and flywheel runout. They also verify torque values and alignment during installation. Manufacturer service data should guide every measurement, especially on modern hydraulic systems. A stronger clutch is not always the best solution. Excessive clamp load may increase pedal effort and stress related components. That trade-off deserves attention.

I have seen new clutch kits fail early because an old oil seal was ignored. I have also seen drivers blame the clutch for a worn engine mount. These mistakes are easy to repeat. Effective maintenance combines mechanical evidence, suitable parts, correct installation, and restrained driving technique. Results may not appear immediately, but consistent care protects engagement quality, heat resistance, and long-term service life.
How to Improve Clutch Performance and Durability

Understand the Clutch System and Its Performance Factors

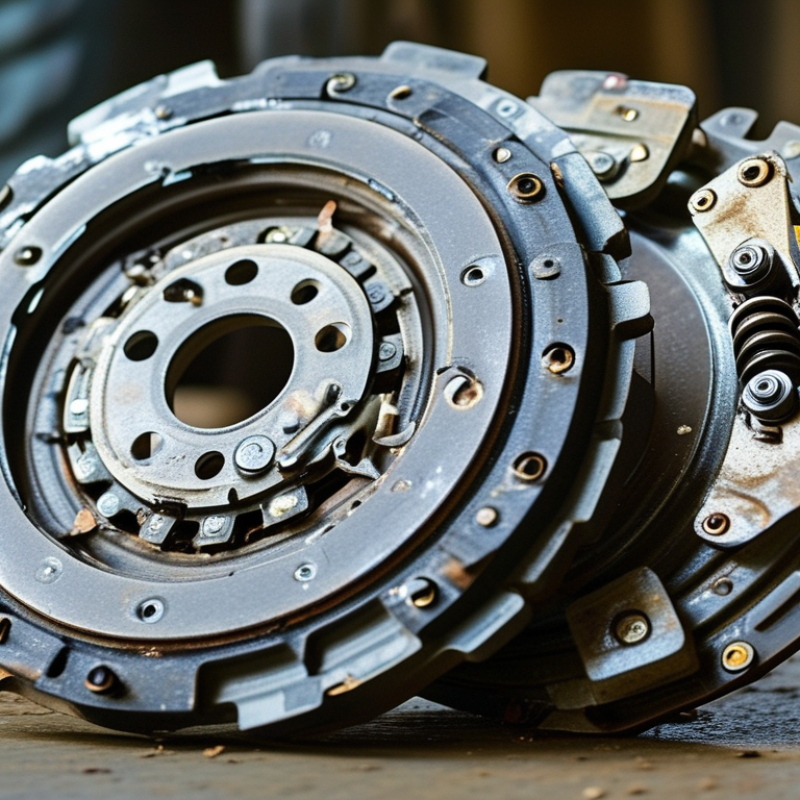
A clutch transfers engine torque to the transmission through controlled friction. Its main parts include the friction disc, pressure plate, flywheel, release bearing, and actuation system. Each part must work in alignment. Even a small installation error can create vibration, noise, or uneven engagement.

Clutch performance depends on more than friction material. Engine torque, vehicle weight, driving habits, and operating temperature all matter. Heat from repeated slipping can harden the friction surface and weaken spring pressure. Oil or hydraulic fluid on the disc can cause grabbing or slipping. A worn release bearing may produce a sharp sound when the pedal is pressed. In practical service work, checking the linkage, hydraulic travel, and flywheel condition often reveals problems before replacement becomes necessary.

Smooth engagement improves durability. Hold the vehicle with the brake, not the clutch. Avoid resting a foot on the pedal. During heavy traffic, allow full engagement whenever conditions permit. Inspect for leaks and measure pedal travel according to reliable service data. I once underestimated minor flywheel scoring; the replacement clutch later engaged unevenly. That mistake showed how surface condition affects the entire system. Still, no single symptom proves one fault. A slipping clutch may involve wear, contamination, incorrect adjustment, or excessive load. Careful testing is essential.

Identify Common Causes of Clutch Wear and Failure

Clutch wear usually begins with heat, not mileage alone. Repeatedly holding the vehicle on a hill with the pedal partly released creates sustained friction. Heavy traffic, towing, and rushed gear changes increase the load on the friction disc and pressure plate. SAE technical research on dry clutches consistently identifies excessive slip, thermal cycling, and contamination as major failure mechanisms. Oil from a leaking rear seal can make the disc grab, shudder, or lose transmission capacity. A burning smell after a steep climb is a warning, not a normal operating condition.

Driving technique matters more than many owners expect. The U.S. Department of Energy reports that aggressive driving can reduce fuel economy by 15–30% on highways and 10–40% in stop-and-go traffic. That figure does not measure clutch wear directly, but it shows how repeated acceleration and braking increase mechanical stress. Service records often reveal the real pattern: a worn release bearing may produce a sharp chirp, while a failing hydraulic system can cause difficult engagement. Diagnosis should include pedal travel, fluid condition, flywheel surface, and measured disc thickness. I have seen drivers replace the disc while ignoring a leaking seal. The repair failed again.

Tips: Use the brake on hills, not clutch slip. Shift smoothly. Avoid resting your foot on the pedal. If engagement becomes uneven, inspect it early. A small vibration is easy to dismiss, and that is sometimes the costly mistake.

Select Compatible Components and Set Correct Adjustments

Improving clutch performance begins with compatible components, not maximum clamping force. Match the clutch disc diameter, spline count, hub depth, and friction material to the vehicle’s transmission and flywheel. A pressure plate with excessive clamp load can increase pedal effort and accelerate bearing wear. The release bearing, pilot bearing, and fork must also work within the same operating range. Small mismatches may cause noise, incomplete release, or rapid disc damage.

Measure the flywheel before installation. Its surface should be flat, clean, and within the manufacturer’s service limits. I once treated light scoring as harmless. That assumption was wrong. The clutch engaged unevenly after a short test drive. Use calibrated tools to tighten fasteners in the specified sequence and torque range. Avoid touching friction surfaces with greasy hands.

Correct adjustment protects both performance and durability. Set pedal free play according to the service specification, then confirm that the release lever moves smoothly. Too little clearance can keep the clutch partially disengaged, creating heat and slip. Too much clearance may prevent complete release, causing gear clash. Check hydraulic fluid condition, air in the line, cable routing, and return spring tension. A short road test should include gentle starts, reverse selection, and moderate acceleration. Recheck adjustment afterward, because new parts can settle slightly. Real-world conditions sometimes expose problems that a workshop inspection misses.

Use Driving and Maintenance Practices That Reduce Wear

Clutch life depends heavily on how the pedal is used. A driver who holds the vehicle on a hill with clutch slip creates heat against the friction disc. Use the brake instead, then release the clutch smoothly. At traffic lights, select neutral and release the pedal. Small habits matter.

The U.S. Department of Energy reports that aggressive driving can reduce fuel economy by 15–30% on highways and 10–40% in city traffic. Those sharp launches also increase clutch engagement speed and thermal stress. Pull away with moderate throttle. Avoid resting your foot on the pedal, even lightly. It can partially disengage the clutch without an obvious smell.

Workshop inspection data and SAE technical studies consistently link repeated slipping, excessive heat, and poor adjustment with accelerated friction-material wear. A loaded vehicle, steep ramp, or trailer needs more control, not more pedal pressure. Pause between difficult manoeuvres when safe. Let the assembly cool.

I used to keep the clutch engaged in slow queues. It felt convenient, but the release bearing worked continuously. That habit was unnecessary. Maintenance should include checking pedal free play, hydraulic leaks, and unusual engagement points during scheduled servicing. A high bite point can indicate wear, although diagnosis from one symptom is imperfect. Record changes in engagement, vibration, and smell before they become failures.

Inspect, Test, and Troubleshoot Clutch Performance Over Time

How to Improve Clutch Performance and Durability

Clutch performance changes slowly, then suddenly. During a road test, note engagement height, pedal effort, shudder, and slipping under load. A useful check is fourth gear at low speed. Apply moderate throttle and watch engine speed. If rpm rises without matching road speed, clutch slip is likely. Do not repeat this test excessively. It creates heat.

Inspect the hydraulic reservoir, release mechanism, cable adjustment, and bellhousing area for leaks or contamination. Measure free play against the vehicle’s service specification, not a generic internet value. The U.S. Department of Energy reports that aggressive driving can reduce fuel economy by 15–30% at highway speeds and 10–40% in stop-and-go traffic. That figure is not clutch-specific, but repeated hard launches and high-rpm shifts clearly increase friction heat. A smell like hot paper matters. So does a pedal that returns slowly.

Keep a dated record of mileage, symptoms, load, and temperature. The U.S. Environmental Protection Agency’s fuel-economy guidance also links smooth acceleration and proper maintenance with better efficiency, supporting a measured driving approach. I once treated mild shudder as harmless; that delayed inspection and complicated the diagnosis. My mistake. If vibration appears only when hot, test again after normal driving, then compare cold and warm results. Replace contaminated friction components, correct the leak, and recheck engagement before returning the vehicle to heavy service.

How to Improve Clutch Performance and Durability - Inspect, Test, and Troubleshoot Clutch Performance Over Time
Inspection Stage Performance Area What to Inspect or Test Typical Warning Signs Likely Causes Recommended Action Priority
Before Installation Clutch component condition Check the friction disc, pressure plate, release bearing, pilot bearing, splines, springs, and flywheel for damage, contamination, corrosion, or abnormal wear. Oil-stained friction material, cracked components, loose damper springs, damaged splines, or uneven friction surfaces. Improper storage, handling damage, oil leaks, incorrect parts, or previous overheating. Replace damaged or contaminated parts. Correct fluid leaks and verify that all components match the application. High
Before Installation Flywheel surface Measure flatness and inspect for blue discoloration, heat checks, cracks, grooves, and excessive surface wear. Confirm that machining maintains the specified step height. Judder, clutch slip, uneven engagement, noise, or rapid friction-material wear after installation. Excessive runout, incorrect resurfacing, hot spots, or a surface that is too smooth or uneven. Machine or replace the flywheel according to the vehicle or equipment service specification. Clean the surface thoroughly. High
Before Installation Alignment and fit Use an alignment tool to center the friction disc. Verify input-shaft fit, spline engagement, dowel alignment, and transmission seating without force. Difficulty installing the transmission, clutch drag, abnormal noise, or premature bearing failure. Misalignment, incorrect disc orientation, damaged splines, or forced assembly. Correct the disc orientation and alignment. Never draw the transmission into position using mounting bolts. High
Installation Fastener control Inspect bolt threads and tightening sequence. Tighten the pressure-plate and flywheel fasteners gradually and evenly using a calibrated torque wrench. Pressure-plate distortion, vibration, uneven release, loose fasteners, or damaged threads. Uneven tightening, incorrect torque, contaminated threads, or missing locating dowels. Follow the applicable service specification and tightening sequence. Replace damaged fasteners where required. High
Installation Release system Inspect the release fork, pivot, guide tube, hydraulic cylinder, cable, linkage, and release bearing. Confirm smooth movement and correct bearing contact. Heavy pedal effort, incomplete release, squealing, grinding, or a pedal that does not return normally. Worn pivots, air in the hydraulic circuit, seized guide surfaces, incorrect adjustment, or a damaged bearing. Repair or lubricate only where specified. Bleed hydraulic systems correctly and replace worn components. High
Initial Road or Functional Test Clutch engagement Test engagement in a safe area under light, moderate, and normal operating loads. Observe take-up smoothness and pedal travel. Shudder, chatter, grabbing, delayed engagement, or engagement near the top or bottom of pedal travel. Contamination, flywheel runout, uneven surfaces, worn engine or transmission mounts, or release-system faults. Identify whether the vibration is clutch-related or mount-related. Recheck alignment, surfaces, and hydraulic or mechanical adjustment. Medium
Initial Road or Functional Test Clutch slip With the engine at operating temperature, compare engine-speed increase with vehicle or driven-shaft acceleration during a controlled high-load test. Engine speed rises without a proportional increase in vehicle speed, burning odor, or reduced hill-climbing ability. Worn friction material, oil contamination, insufficient clamp load, incorrect adjustment, or excessive load. Check free play, hydraulic return, leaks, friction surfaces, and load requirements. Replace contaminated or worn components. High
Initial Road or Functional Test Clutch drag With the clutch fully depressed, select reverse or first gear and check whether the vehicle or driven equipment remains stationary without abnormal gear clash. Gear clash, creeping with the pedal fully depressed, difficult gear selection, or transmission input-shaft rotation. Insufficient release travel, air in the hydraulic system, warped disc, pilot-bearing drag, or incorrect disc installation. Measure pedal and release travel. Bleed the system, inspect disc orientation, and check the pilot bearing and release mechanism. High
First 500 km or Initial Hours Break-in behavior Monitor engagement smoothness, odor, pedal feel, and load response during the early operating period. Avoid prolonged slipping and unnecessary high-load launches. Persistent odor, severe chatter, rapid slip, or abnormal noise that does not improve after normal use. Excessive heat during break-in, contamination, incorrect installation, or unsuitable operating technique. Stop repeated slip testing. Inspect for overheating or contamination and resolve the underlying installation or operating issue. High
Every Service Interval Leaks and contamination Inspect the rear engine seal area, transmission input seal, hydraulic system, bellhousing, and nearby fluid lines for leakage or seepage. Oil or hydraulic fluid on the bellhousing, slipping, odor, soft pedal, or visible fluid loss. Failed seals, loose fittings, damaged hoses, or overfilled fluid reservoirs. Repair the leak before fitting new friction components. Clean affected surfaces and verify fluid levels. High
Every Service Interval Pedal and release travel Measure pedal free play, total travel, release travel, and return action against the applicable service specification. Engagement-point changes, heavy pedal, incomplete release, or a pedal that remains low or sticks. Adjustment drift, cable stretch, hydraulic leakage, air, worn linkage, or blocked compensation passage. Adjust only within the specified range. Repair leaks, bleed the system, and replace worn linkage or cables. Medium
Every Service Interval Noise diagnosis Listen with the clutch engaged, disengaged, and during gear changes. Use a mechanic’s stethoscope or vibration tool when appropriate. Whining, growling, squealing, rattling, or noise that changes when the pedal is pressed. Release bearing wear, pilot-bearing wear, input-bearing damage, loose components, or damper-spring movement. Determine whether noise changes with pedal position and shaft speed. Inspect the relevant bearing or clutch assembly before continued use. Medium
Every Service Interval Mounts and driveline alignment Inspect engine and transmission mounts, driveline angles, fasteners, and adjacent shafts for movement, cracking, or looseness. Clutch chatter, driveline vibration, clunks during engagement, or excessive powertrain movement. Collapsed mounts, loose fasteners, misalignment, worn universal joints, or driveline imbalance. Repair mount or driveline faults before replacing clutch parts, since vibration may not originate in the clutch. Medium
At Scheduled Overhaul Friction-material wear Remove and measure the friction disc when service access is available. Check lining thickness, rivet depth, heat damage, and damper-spring security. Frequent slipping, reduced torque capacity, abnormal engagement, exposed rivets, or damaged springs. Normal wear, repeated overload, riding the clutch, excessive towing, or poor heat dissipation. Replace the disc when wear or damage reaches the applicable service limit. Inspect the pressure plate and flywheel at the same time. High
At Scheduled Overhaul Thermal condition Inspect for blue or purple discoloration, heat checks, glazing, warped surfaces, and signs of repeated overheating. Burning odor, repeated slip under load, judder, hard engagement, or visible heat spots. Prolonged partial engagement, excessive payload, repeated high-energy starts, or inadequate cooling. Correct operating practices and load conditions. Replace heat-damaged components and verify flywheel and pressure-plate flatness. High
Long-Term Monitoring Service-life tracking Record installation date, operating hours or distance, load profile, symptoms, repairs, adjustment values, and inspection results. Unexplained changes in engagement point, repeated repairs, shortening replacement intervals, or recurring symptoms. Unrecorded overload, incorrect parts, unresolved leaks, poor adjustment, or a recurring system fault. Use maintenance records to identify trends and schedule inspection before performance falls below an acceptable level. Low
Any Time Safe operating practice Avoid resting a foot on the pedal, holding the vehicle with clutch slip, repeated high-rpm launches, and unnecessary half-clutch operation. Premature wear, frequent burning odor, high engagement temperature, or shortened clutch life. Excessive heat and friction caused by partial engagement or operation beyond the intended load capacity. Use the brake for holding, fully release the pedal when driving, select the appropriate gear, and respect rated load limits. Low

Note: Inspection intervals, wear limits, torque values, pedal travel, and adjustment requirements vary by vehicle or equipment design. Always confirm measurements and procedures against the applicable service specification.

FAQS

What commonly causes clutch wear?

Heat usually starts the damage, not mileage alone. Hill holding, heavy traffic, towing, and rushed gear changes increase friction. Heat comes first.

How can I protect the clutch on hills?

Use the brake instead of holding the vehicle with partial pedal release. This reduces continuous slipping and surface heat. It feels slower, but it protects the friction disc.

What does a burning smell after climbing indicate?

It often signals excessive clutch heat. Stop repeated slipping and allow the system to cool. A burning smell is a warning, not normal operation.

Which symptoms suggest clutch or hydraulic problems?

Uneven engagement may cause shuddering or vibration. A sharp chirp can suggest release-bearing wear. Difficult engagement may involve the hydraulic system, air, or incorrect adjustment.

What should a proper clutch inspection include?

Check pedal travel, fluid condition, disc thickness, flywheel surface, and release movement. Inspect seals for oil leaks. Replacing only the disc may not solve the problem.

How should replacement components be matched?

Match disc diameter, spline count, hub depth, and friction material. The pressure plate, release bearing, pilot bearing, and fork must share compatible operating ranges.

Why must the flywheel be measured before installation?

The surface should be flat, clean, and within service limits. Light scoring may look harmless. I once ignored it, and engagement became uneven after a short drive.

How does adjustment affect clutch durability?

Too little free play can cause constant slipping and heat. Too much can prevent complete release and create gear clash. Set the adjustment to the service specification, then road-test it.

What should a short road test check?

Test gentle starts, reverse selection, and moderate acceleration. Listen for noise and feel for vibration. Recheck the adjustment afterward because new parts may settle slightly.

Conclusion

Improving clutch performance and durability begins with understanding how the clutch system transfers power and how its main components work together. What factors affect clutch performance and durability include driving habits, operating temperature, component compatibility, adjustment accuracy, load conditions, lubrication, and the quality of routine maintenance. Excessive slipping, repeated heavy loads, contamination, incorrect installation, and poor adjustment can accelerate wear, cause overheating, and lead to premature failure.

To extend clutch life, select compatible components, set the correct free play and engagement position, and follow proper installation procedures. Smooth gear changes, avoiding unnecessary clutch slipping, and reducing harsh starts can significantly lower stress on the system. Regular inspections should check for unusual noise, vibration, difficult shifting, burning odors, fluid leakage, and changes in pedal feel. Testing these symptoms over time and troubleshooting them early helps prevent minor issues from developing into costly repairs while maintaining consistent clutch performance.

Aria

Aria

Aria is a dedicated marketing professional with a deep passion for innovative strategies and a keen understanding of our company's product offerings. With a wealth of experience in the industry, Aria excels at crafting engaging content that highlights the unique features and benefits of our......