A slipping clutch can turn a smooth morning drive into a worrying rise in engine speed. The tachometer climbs, but the vehicle barely gains momentum. This often appears during hill starts, hard acceleration, or when towing a load. A sharp burning smell may follow. Do not ignore it.
Understanding how to fix slipping clutch problems begins with accurate diagnosis. Worn friction plates, weak pressure springs, oil contamination, incorrect cable adjustment, and hydraulic faults can create similar symptoms. Experienced technicians usually test clutch engagement, inspect fluid leaks, and compare engine speed with road speed. A service manual should guide every adjustment, because excessive free play can be as harmful as insufficient clearance. Small details matter, including the pedal’s biting point and unusual vibration through the floor.
This guide examines seven practical repair approaches, from checking linkage settings to replacing damaged clutch components. Some solutions are simple. Others require removal of the gearbox and professional tools. A rushed adjustment may hide the problem temporarily, while continued driving can damage the flywheel and pressure plate. That mistake is easy to make.
Reliable repairs depend on evidence, not guesses. Photographing leaks, recording when slipping occurs, and checking maintenance history can help a qualified mechanic identify the real cause. If the clutch slips under normal traffic, avoid heavy loads and steep climbs until it is inspected. Safety should remain part of the repair plan.
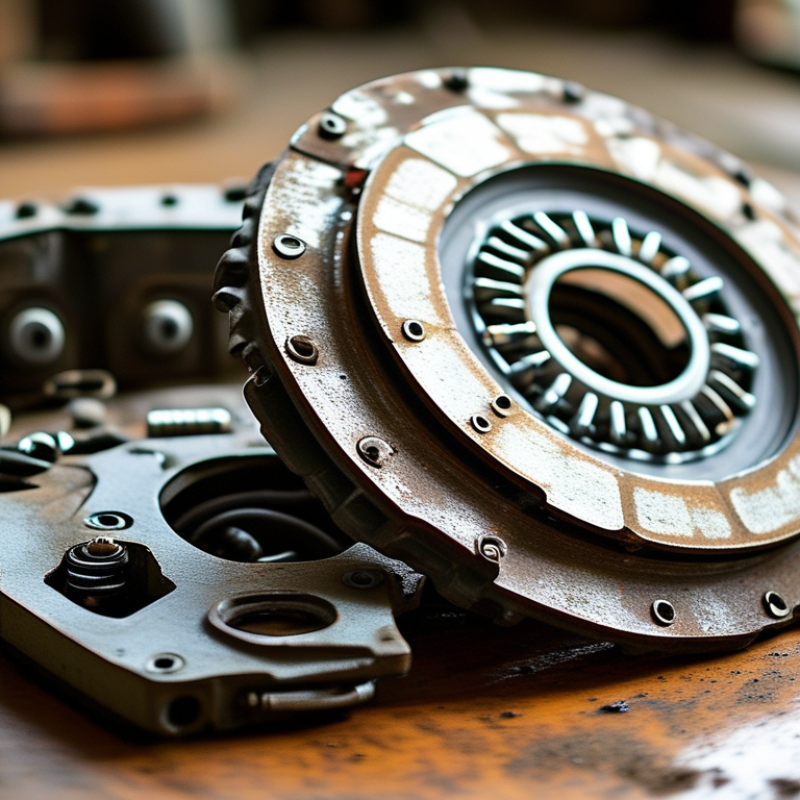
A slipping clutch often reveals itself before complete failure. The engine speed rises, but the vehicle gains little speed. This is especially noticeable during uphill driving or hard acceleration. The tachometer may jump while the road speed barely changes. That mismatch is a key warning sign.
Pay attention to unusual smells, too. A hot, sharp odor can come from overheated clutch friction material. It may resemble burnt paper after repeated stop-and-go driving. Some drivers also notice engagement near the top of the pedal travel. A soft, inconsistent pedal deserves attention. Shuddering during takeoff can indicate contamination, wear, or another drivetrain fault. It is not always the clutch itself.
A simple road check can provide useful evidence. On a safe, quiet road, select a higher gear at low speed and gently accelerate. If engine speed flares without matching acceleration, arrange a professional inspection. Do not repeat this test aggressively. Excessive slipping creates heat and can worsen damage quickly. Check for fluid leaks near the transmission, although many clutch problems show no visible leak. My practical mistake was treating a brief odor as harmless after heavy traffic. It disappeared, but the underlying wear did not. Accurate diagnosis requires checking the clutch disc, pressure plate, release system, and hydraulic components, rather than replacing parts by guesswork.
A slipping clutch often starts with the hydraulic system, not the clutch disc. The U.S. Bureau of Transportation Statistics reported that American light vehicles averaged about 12.5 years old in 2023. Age increases the chance of brittle seals, contaminated fluid, and stretched cables.
Park on level ground. Inspect the master cylinder, slave cylinder, and hose connections for wetness. Check the reservoir level against its markings. Low fluid usually indicates a leak, not normal consumption. Press the clutch pedal several times. A soft or sinking pedal suggests trapped air or internal seal failure. Bleed the system carefully, then retest engagement.
Cable-operated clutches need equal attention. Measure pedal free play with a ruler, following the service specification. Too little free play can hold the release bearing against the pressure plate. Too much may prevent full disengagement. Adjust the cable in small turns, then lock the adjuster securely. Do not guess.
Try a controlled road test. Select a higher gear at low speed and apply moderate throttle. Rising engine speed without matching vehicle speed confirms slip. However, a worn disc can mimic hydraulic faults. This is where diagnosis becomes imperfect. I have seen owners adjust a cable repeatedly when the real problem was oil contamination. Record fluid condition, pedal height, and engagement point before replacing parts. Industry service data from the National Institute for Automotive Service Excellence emphasizes systematic inspection because adjustment errors can create repeat failures. Never ignore burning smells or sudden engagement changes.
| No. | Repair Approach | What to Inspect | Recommended Action | Expected Result | Important Caution |
|---|---|---|---|---|---|
| 1 | Confirm the slipping symptoms | Engine speed rises without a matching increase in vehicle speed, especially during acceleration, hill climbing, or when carrying a load. | Road-test only in a safe area. Compare the symptom in a higher gear at moderate engine speed and avoid prolonged high-load testing. | The symptom is repeatable and can be separated from engine misfire, transmission faults, or traction loss. | Do not continue driving if the clutch produces smoke, a strong burning odor, or severe loss of drive. |
| 2 | Check clutch pedal free play | Measure the distance the pedal moves before resistance is felt. Excessive free play may prevent full release, while insufficient free play can hold the release mechanism partly engaged. | Use the vehicle service specification. Adjust the cable or linkage only where an adjustment mechanism is provided, then recheck pedal operation. | The pedal has the specified free play, engages smoothly, and does not remain partially depressed. | Do not guess the specification; free-play requirements vary by vehicle and clutch design. |
| 3 | Inspect and adjust the clutch cable | Look for a stretched, kinked, frayed, seized, or incorrectly routed cable. Check the outer sheath, adjuster threads, clevis, and release lever. | Lubricate only if the cable design permits it. Replace damaged or binding cables. Adjust the cable so the release lever returns fully and the clutch still disengages completely. | The lever returns to its stop, the pedal effort is consistent, and the clutch does not slip under load. | A cable adjusted too tightly can cause continuous clutch slip and rapid friction-plate wear. |
| 4 | Test the hydraulic clutch system | Inspect the fluid reservoir, master cylinder, hydraulic line, flexible hose, slave cylinder, and connections for low fluid, wetness, corrosion, or air entry. | Repair leaks, use the specified fluid, and bleed the system according to the service procedure. Replace contaminated or damaged hydraulic components. | The pedal feels firm and consistent, the release point is stable, and the clutch fully engages without hydraulic pressure holding it off. | Use only the fluid type specified for the vehicle. Keep fluid away from paint and friction surfaces. |
| 5 | Check for oil or fluid contamination | Inspect the bell housing area and underside of the engine or transmission for oil, hydraulic fluid, or grease reaching the clutch assembly. | Identify and repair the leaking engine seal, transmission seal, hydraulic component, or excessive-grease source. Replace contaminated friction components when cleaning cannot restore reliable friction. | The clutch engages without shudder or slip after the leak is repaired and contaminated parts are replaced as necessary. | Do not spray solvents into an enclosed bell housing unless the approved service procedure allows it. |
| 6 | Inspect the clutch friction and pressure components | Check the friction disc for worn lining, heat marks, glazing, broken springs, or an uneven surface. Inspect the pressure plate and release bearing for damage or abnormal wear. | Remove and replace worn or heat-damaged clutch components as a matched service set when required. Inspect the flywheel or drive surface for warping, cracks, or excessive scoring. | Engagement is smooth, torque transfer is restored, and no burning smell appears during normal acceleration. | Support the transmission correctly and follow lifting, alignment, and torque procedures during disassembly. |
| 7 | Verify driving load and break-in practices | Consider repeated riding of the clutch, holding the vehicle on a slope with the pedal, excessive towing, overloading, or incorrect gear selection. | Use the correct gear, release the pedal fully after shifting, and avoid prolonged clutch slipping. After replacement, follow the component maker's break-in guidance and avoid heavy loads during the initial period. | Clutch temperature and wear are reduced, with no recurrence of slipping during normal operating conditions. | Do not use the clutch as a substitute for the parking brake on steep grades. |
A slipping clutch often reveals itself during acceleration. The engine speed rises, but the vehicle gains speed slowly. Burning friction material may also produce a sharp, dusty smell. Do not ignore it.
Inspect the clutch through a structured diagnosis. Check the pedal free play and hydraulic fluid level first. Incorrect adjustment can mimic a worn clutch. If those checks pass, remove the transmission and examine the friction disc. Look for thin linings, oil contamination, cracked springs, or uneven wear. Measure the pressure plate and flywheel surfaces against service specifications. A glossy or blue-marked flywheel suggests excessive heat. A quick visual check is not enough. Small distortions can cause repeated slipping.
Replace worn components as a matched set when practical. Install a new friction disc, pressure plate, and release bearing if any part shows serious wear. Inspect the rear engine seal and transmission input seal before installation. Even a small leak can soak the new disc and bring the problem back. Resurfacing or replacing a damaged flywheel may also be necessary. Clean handling matters; greasy fingers can contaminate the lining. Align the disc carefully, torque fasteners in a crisscross pattern, and follow the vehicle’s specified sequence. I have seen rushed repairs fail because technicians replaced only the disc. That shortcut saves time briefly, but it can waste the entire repair. After assembly, test engagement gradually in a safe area and watch for shudder, noise, or renewed slipping.
A slipping clutch may start with a soft bite point, rising engine speed, and little acceleration. Oil contamination is a frequent suspect. Check the bell housing, crankshaft seal, gearbox input seal, and nearby drain holes. Do not blame the clutch immediately. A worn hydraulic system can feel similar.
S&P Global Mobility’s 2024 report places the average United States light vehicle age at 12.6 years. Older seals deserve careful inspection. The seven practical fixes are clear: confirm slipping with a controlled road test; trace the leak with a clean surface; replace the failed seal; inspect the flywheel for oil; replace the contaminated friction disc; check release-bearing movement and clutch alignment; then road-test again. Never rely on solvent alone. Oil-soaked friction material often stays unstable after cleaning. A clean-looking housing can still hide a slow leak. That detail is easy to miss.
Tips: Place clean cardboard beneath the vehicle overnight. Mark fresh drops with chalk. Use a torque wrench during reassembly. Check fluid levels before testing. If the clutch improves briefly, stop and inspect again. A quick spray may mask the symptom, not repair it. Technician judgment matters, but measurements should lead.
Test the clutch before replacing parts. Drive in fourth gear at low speed, then press the accelerator firmly. If engine speed rises without matching road speed, the clutch may be slipping. Watch for a sharp, acrid smell near the bell housing. Check pedal free play, hydraulic fluid level, and signs of oil leakage. A soft pedal can point to hydraulic trouble, not a worn friction disc.
A hill test can help, but it is not a complete diagnosis. Excessive throttle can create heat and imitate clutch failure. In workshop practice, comparing engine speed with vehicle speed gives better evidence than relying on smell alone. The U.S. Department of Energy reports that aggressive driving can reduce fuel economy by 10–40% in city traffic, increasing heat and drivetrain stress. Smooth gear changes matter.
Prevention starts with habits. Do not rest your foot on the pedal or hold the vehicle on a slope with clutch slip. Repair fluid leaks quickly, because oil contamination can ruin the friction surface. S&P Global Mobility reported that the average U.S. light vehicle reached about 12.6 years in 2024. Older vehicles need closer inspection of cables, hydraulics, mounts, and flywheel surfaces. Still, mileage alone is imperfect. Stop-and-go traffic can wear a clutch faster than highway driving, so maintenance records and driving conditions deserve equal attention.
: Engine speed rises, but road speed increases slowly. A sharp, dusty smell may appear near the transmission housing. Do not ignore it.
Drive slowly in fourth gear on a safe, open road. Press the accelerator firmly. Rising engine speed without matching acceleration suggests slipping. This test is not perfect.
Yes. Check pedal free play and hydraulic fluid first. A soft pedal may indicate hydraulic trouble instead of worn friction material.
Check for thin linings, oil contamination, cracked springs, and uneven wear. Inspect pressure plate and flywheel surfaces against service specifications.
It usually shows excessive heat. Small distortions may remain hidden during a quick visual check. Resurfacing or replacement may be necessary.
Replace the friction disc, pressure plate, and release bearing as a matched set when practical. Replacing only one part can cause repeated repairs.
Inspect the engine rear seal and transmission input seal. Even a small oil leak can soak the new disc and cause slipping again.
Keep friction surfaces clean. Align the disc carefully. Tighten fasteners in a crisscross pattern and follow the specified sequence. Greasy fingers can contaminate the lining.
Do not rest your foot on the pedal or hold a slope with clutch slip. Repair leaks quickly. Stop-and-go driving deserves closer inspection than mileage alone.
Test engagement gradually in a safe area. Watch for shudder, unusual noise, or renewed slipping. I might miss a subtle vibration at first.
Learning how to fix slipping clutch problems starts with recognizing the warning signs, such as rising engine speed without matching acceleration, delayed engagement, burning odors, or difficulty maintaining power on hills. Begin by checking the clutch hydraulic system for low fluid, trapped air, leaks, or a damaged master or slave cylinder. If the vehicle uses a cable, confirm that it is correctly adjusted and moves smoothly. Incorrect free play can prevent the clutch from fully engaging and may cause premature wear.
Next, inspect the clutch disc, pressure plate, release bearing, and related components for excessive wear, heat damage, or contamination. Replace damaged parts as a complete, properly matched set when necessary. Oil leaking from the engine or transmission should also be repaired because even a small amount can make the clutch disc slip. After repairs, test engagement, pedal feel, acceleration, and performance under load. Regular inspections, correct adjustments, careful driving, and prompt attention to leaks can help prevent future slipping clutch problems.

Galleo Auto Parts